

How To Make Vertical Shelf Dividers
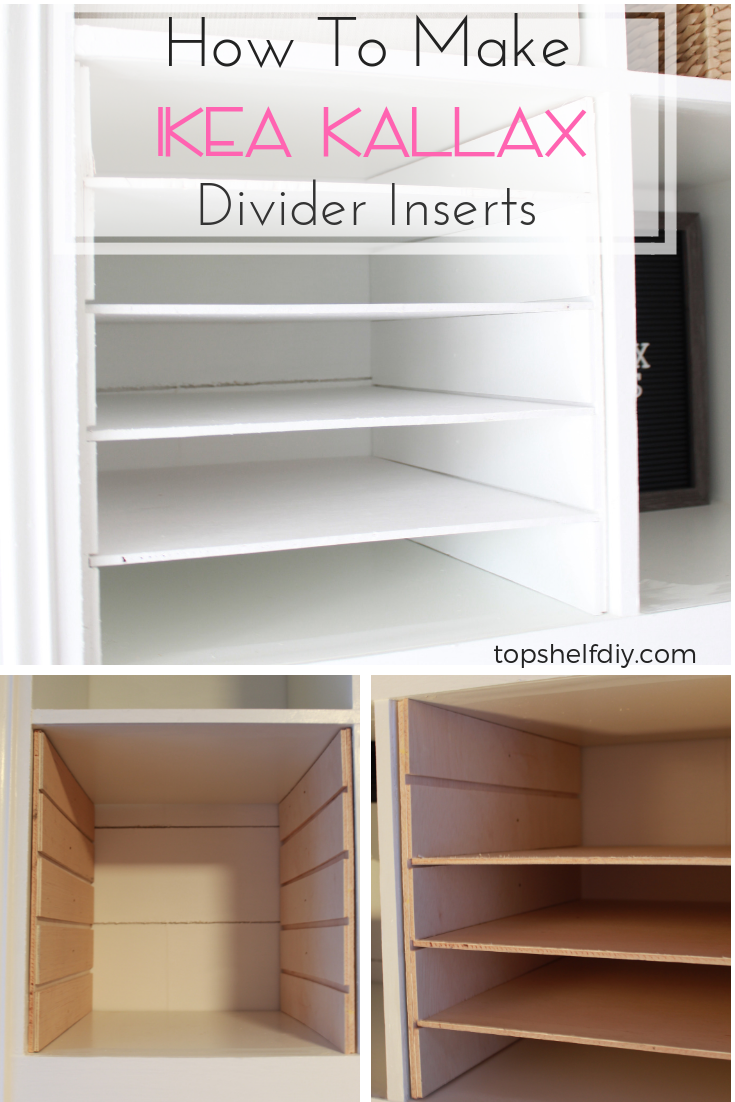
Get Crazy Organizing Your KALLAX for $3 Per Unit
Shelves, shelves, shelves.
When you're knee-deep in kids/pets/household crap, who doesn't need extra shelves? Shelves, dividers, bins…these things are my friends.
Instead of working to afford expensive furniture, IKEA is all nearly making your furniture work for you.
A few weeks ago I shared with you my undercover slot system for installing Vertical Kallax Shelf Dividers. Before long thereafter, I realized I needed some horizontal ones, too.
A cursory search for Kallax shelf cubbies revealed an Etsy listing priced at $51. I thought I could do better than that. I spent $16 on one sheet of plywood with enough left over to make at least 4 or v more units.
End Cost: $3.20 per shelf divider unit.
Here'south what you demand to get started.
Materials
- Table saw (Or use my exact dimensions to take someone rip the pieces for yous)
- Miter saw
- 1/four" plywood (birch is ordinarily my go-to)
- White latex paint. I used Behr's Ultra White in Semi-Gloss.
- Forest glue
- Face clamps
- Small (picture frame) nails ane/ii" or 3/8"
- Your gratis plans! Go them here.
Making Your Ikea Kallax Divider Units
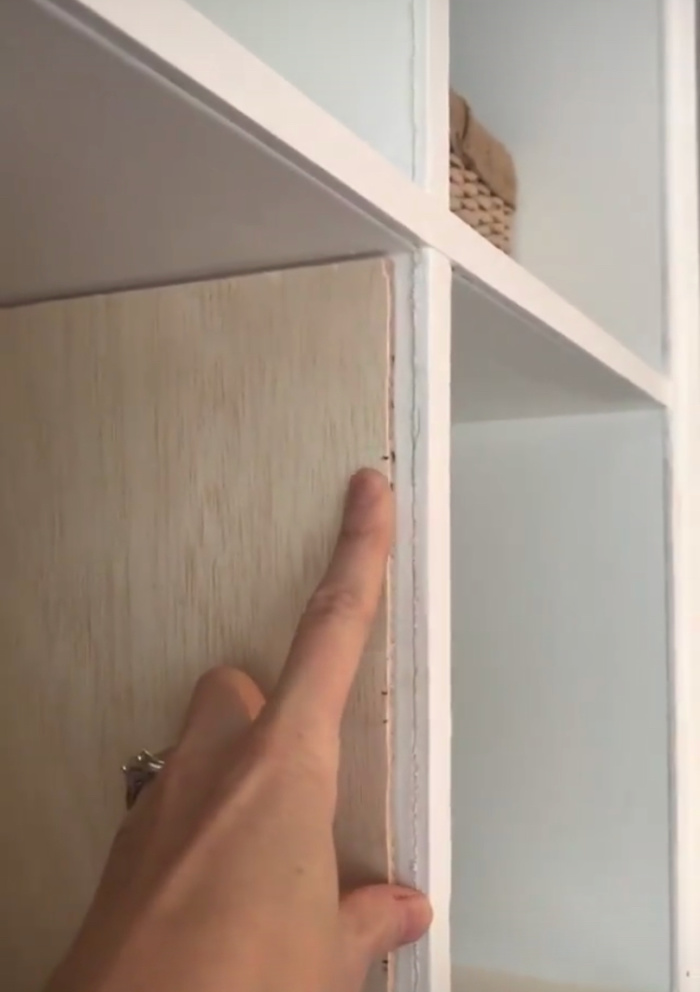
- First by cutting your side panels. From your canvass of plywood, rip downwardly two pieces to exactly xiii-1/8" by fifteen-1/16". Cut information technology to those dimensions exactly. Trust me on this. I've got it down to a science! 😀
- Determine how many slots you want. For me, I wanted v slots, so I needed to cutting iv shelves. The number of slots determines the gap between each shelf. With my arrangement y'all can modify your slot system based on how many slots you want.
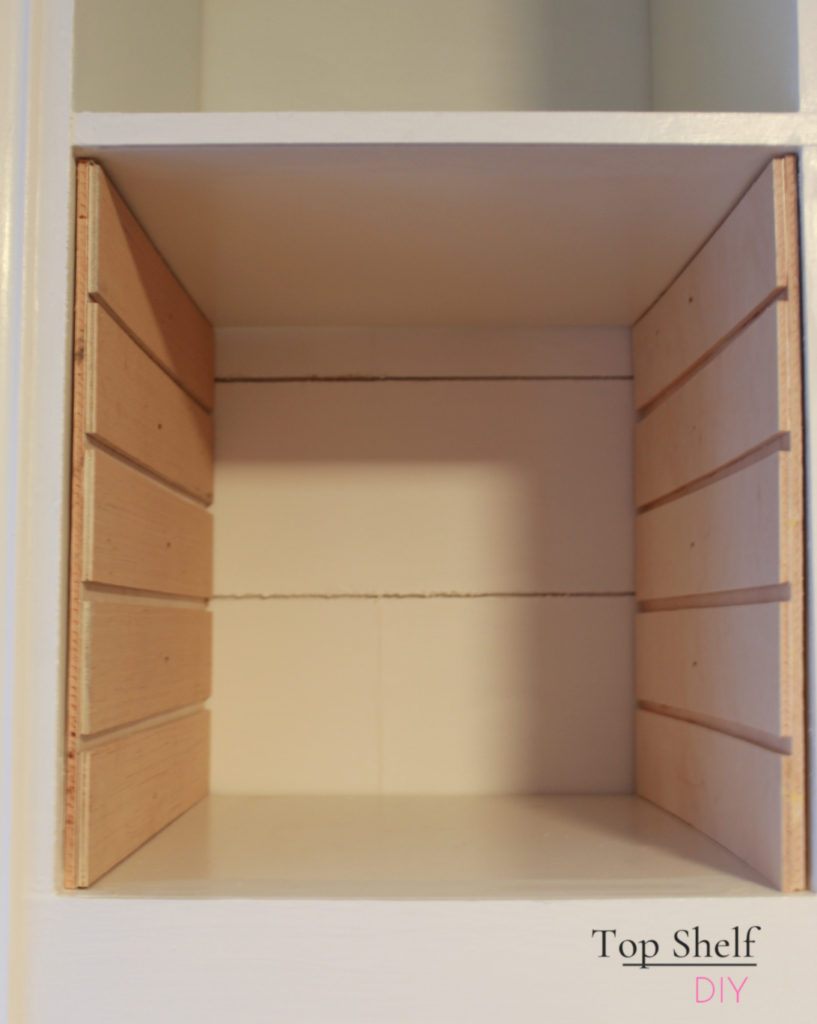
iii. The 1/four" grooves for each shelf are created by glueing down strips of additional plywood. Mine needed to be 2-3/8" wide and 15-i/16" long (aka the depth of your Kallax cube).
four. Here's how to calculate the spacing in your slot system:
[tiptop of cube] - [(width of your Dividers) x (number of dividers +1)]
➗
total number of slots
[13-one/8"] - [(one/four x 5)] / 5
105/8 - ten/viii = 95/viii
95/8 x 1/5 = 95/40 or two-3/viii
In other words, the wood strips of your slot arrangement demand to be cut to 2-3/viii" wide.

I hope I didn't make that too confusing! The reason I multiply the width of your dividers (1/iv") by 5 dividers and not 4 is because that extra ane/iv" ensures a little bit of breathing room for your unit to slide in and out of the KALLAX cube.
If the fractions are disruptive in and of themselves see my quick tutorial on working with fractions and getting accurate measurements every fourth dimension.
five. Using the same sail of plywood, rip downwardly your spacing strips to the measurement you lot adamant in step four. Mine were 15-1/xvi" long past 2-3/8" wide.
6. Lay out your strips so that they're evenly spaced on the panels you cut in step #1.
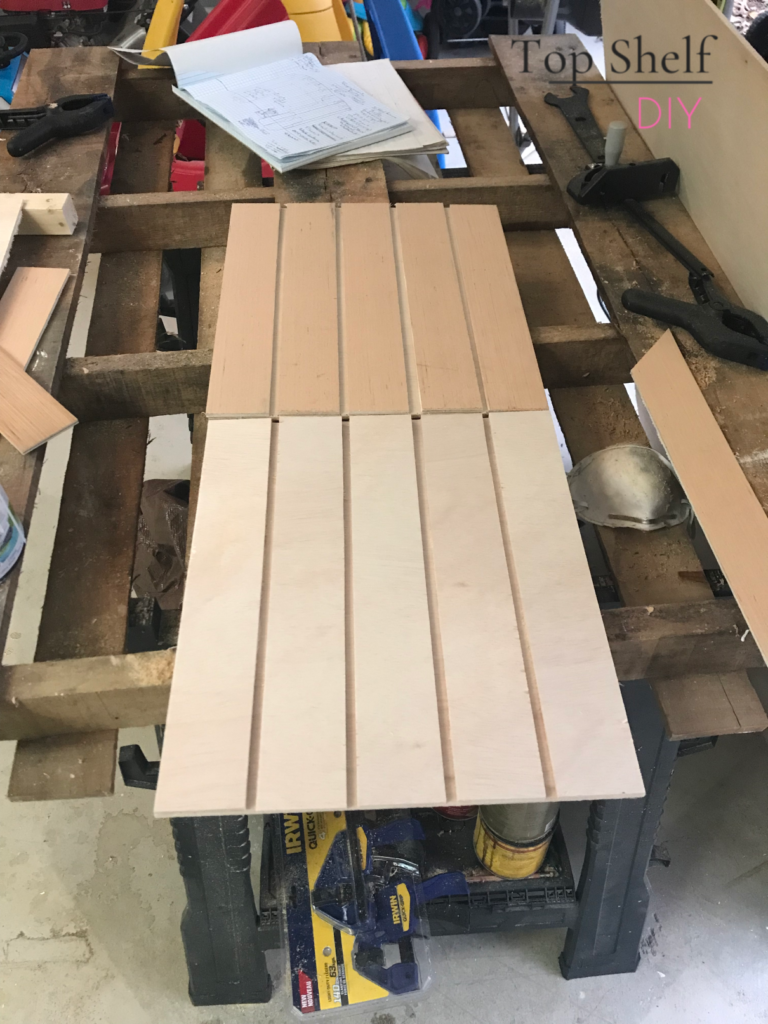
7. Secure your strips to your panels using forest glue and the smallest nails you tin can find (I used teeny tiny picture frame nails). Clamp and allow dry overnight.
8. The adjacent morn, jump out of bed and exam your slot panels while you're still in your underwear. Because who has fourth dimension to dress with all of this excitement?

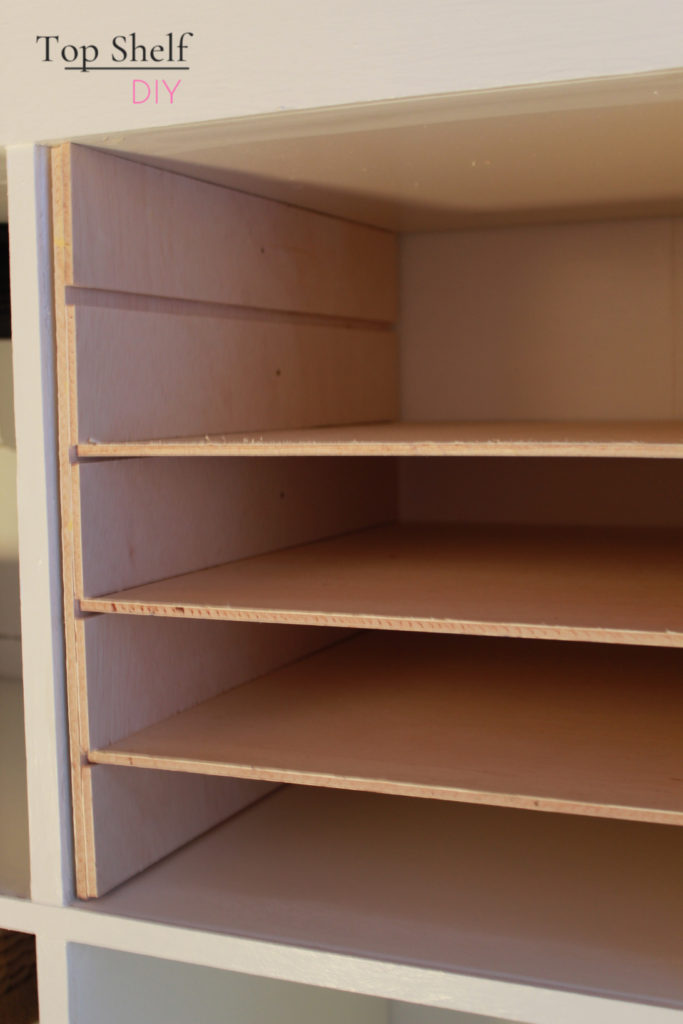
9. Now information technology'southward fourth dimension to cutting your shelves! Y'all tin notch them slightly in front with a jigsaw, to brand papers easier to take hold of. I skipped this step since I'grand storing papers that I rarely need. Only here's an case of how that would look.

You will cut your shelves from the aforementioned plywood to 15-i/16" deep past 12-5/viii".
ten. Slide them in and make sure everything fits.
11. Give everything 1-ii coats of white paint. I went with a semi-gloss end.
12. Replace your unit in one case everything is painted. Since the measurements are so perfectly fitted to your cubby, I recommend that you lot DON'T nail your divider system to your Kallax so that you can move information technology around as needed.

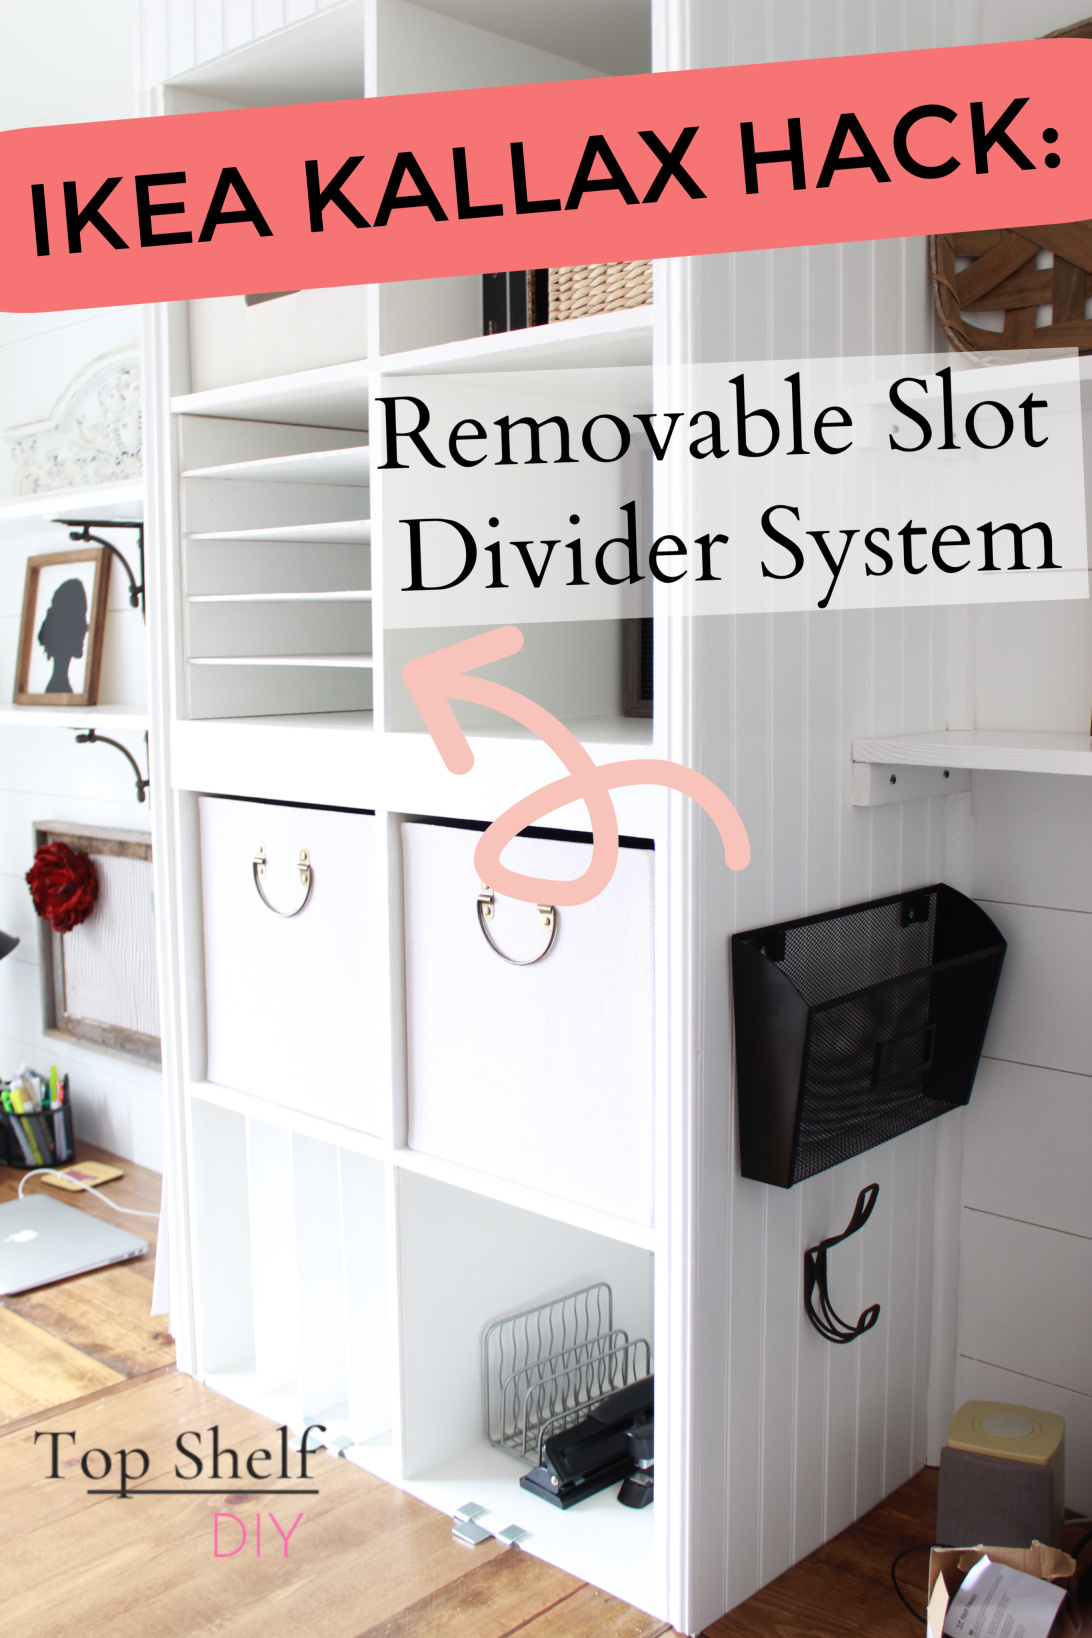
Below is a preview of my entire Congenital-in Kallax Filing Organization. I beloved love hiding ugly cords, documents, and miscellaneous office junk in my deep cubbies!
**Alternate Product Method: If yous have a router, y'all could road ane/4" shelf grooves out of 1/ii" plywood panels instead of applying the long woods strips. I haven't tested this method, only I'm pretty certain it would work and actually exist much faster than waiting for the strips to dry.
Y'all'd never know how messy the residuum of my house looks!

Somehow I inherited a business firm with next to nothing for closet shelving, no entryway storage, and a very pocket-sized pantry...I guess this means you're going to be seeing a lot of shelf building in the new year!
Update: I recently posted the tutorial for making your ain Built-in Kallax System - this mail is a component of the larger pattern plan.
If you'd like to see how the entire His and Hers Office Renovation turned out, you lot can become the full bout here!
Cheers,
Erin
Source: https://topshelfdiy.com/how-to-make-horizontal-ikea-shelf-dividers/
0 Response to "How To Make Vertical Shelf Dividers"
Post a Comment